Lenovo touchscreen calibration. Android screen calibration
Actions that relate to the formulation - calibrating the Android screen include setting up a touch-type display in order for the device to properly execute commands by touching the sensor with a stylus or fingers. Without such a setup, the device will work, but a number of undesirable consequences will arise when operating the gadget.
Some owners of devices running the Android operating system that are equipped with touch screens may sometimes encounter the unwanted problem of “disobedience” of the screen. In other words, when you touch a certain point on the touchscreen with a stylus or finger, the gadget perceives it as a completely different command.
Or there are situations when the sensor executes commands only after the third or fourth attempt. As a rule, the cause of these problems is the incorrect operation of the screen itself, for which it is necessary to calibrate the touchscreen of the device.
 Urgent and correct calibration of the touchscreen on Android may be required in almost all cases if the smartphone has been dropped from any height, and after the device accidentally falls into the aquatic environment, this procedure is mandatory.
Also, calibration of the sensor on Android will be required after repair work on replacing the screen, the appearance of a water stain under the glass of the screen, and after suffering other, at first glance, minor damage.
To check the need for this procedure, you must perform the following steps:
- Remove the special film protecting the screen (to ensure maximum correct operation of the sensor);
- Enter any letter or number;
- If there is a discrepancy between the button pressed on the gadget screen and the information typed, setting up the touchscreen is necessary.
Basic calibration methods
Two methods are used to bring a sensor-sensor that has been knocked out of its normal position into compliance.
These main methods include:
- Using special programs for the Android system;
- Self-correction.
It should be noted that for many brands (Samsung, HTC, Nokia and other Android devices) the calibration steps are practically no different from each other and are identical.
Manufacturers of Android devices, as a rule, can use two types of sensor:
- Resistive (with a screen made using this technology, all sorts of problems very often arise, so the setting is more in demand here, but such screens are practically not used today - these systems can only be seen in budget or already outdated models);
- Capacitive (used in most gadgets, it is more reliable and of higher quality).
Touchscreen calibration using Android
If you do not have access to the Google Play assortment, the display of your Android device can be configured in another way without any problems.
Step-by-step instructions in this case might look like this:
- Go to the “Settings” menu in the gadget;
- Select “Phone settings;
- Find the inscription “Calibration, press the button;
- A cross target with a dot inside will appear on the screen;
- Click on this center of the target that appears at least three times.
After these steps, the device will automatically remember the touches. Thus, the calibration will be considered completed. After completing the setup procedure, you need to check the operation of the touchscreen by pressing a certain character on the screen, which should appear after its input.
Android screen calibration apps
You can configure the sensor using special software. The necessary software to successfully carry out this process can be found freely and freely available on the Internet.
The programs are quite simple to install and operate. But the most important thing is that practically from using any of them you can get a positive and effective result. In the Google Play store you can find free software applications such as Bubble and many others.
Application
This program has an excellent interface and also has some additional special features. Advantages of the application:
- Bubble is a free program;
- Works great with tablets and smartphones;
- Advertising can be disabled in the settings, or it can be left to encourage developers;
- Excellent graphics;
- The presence in the application of a special display that displays the angle of inclination with the highest accuracy in fractions of a degree;
- Easy to use;
- Possibility to fix the angle with a gesture or click;
- The presence of a sound signal at the zero position of the angle;
- If necessary, the ability to lock the screen orientation (horizontal or vertical);
- Ability to reinstall the application on the SD card;
- Disabling, if necessary, the “sleep” mode while the program is running;
- Using full screen mode.
Using the program is completely easy. To do this, after the initial launch, you need to select the type of device screen orientation in the settings (or set the “Auto” mode) and perform level calibration.
For this purpose, the phone is placed horizontally and the calibration button located on the left of the screen is pressed for a short time. “Calidbration” should appear on the touchscreen, and then “Wait”. The application will be ready to function when the screen displays a zero degree value.

The application is a program that allows you to configure the screen parameters of a touch device, while increasing its sensitivity and efficiency. Advantages:
- When using a protective film on the touchscreen, this application can significantly improve the sensitivity of the sensor;
- The slowing effect of using a protective film is eliminated;
- When using a device such as a stylus, some kind of tuning of the gadget becomes simply necessary with the help of this program. Using this application, you can enable complete ignoring of even palm touches (after setting, the hand can rest on the screen when using the stylus);
- If you need to use different settings, you can create separate shortcuts to quickly launch the application;
- The application has a free version.
The program is a professional tool for fine-tuning the level on an iPhone or iPodTouch. The application is used to solve ordinary problems or in more complex areas of use where the tilt of the device needs to be measured quite accurately. Advantages:
- The possibility of full-screen mode, which allows you to switch by clicking on the lower and upper arrows located in the middle of the gadget screen;
- Advanced two-way calibration allowing adjustment on surfaces that are far from level. Any direction is calibrated separately in order to obtain the required accuracy;
- Possibility of free download;
Possible calibration problems
If, however, the device is not calibrated using the method chosen for this purpose, or the application used does not give the necessary positive changes, then experts recommend trying another program, since there are quite a lot of them developed, software in this direction is very diverse. You can also try “Hard reboot” or in other words rebooting the device.
The last option for calibration is to contact a service center. A similar problem with the device screen can be caused not only by incorrect settings, but also by more serious reasons. In particular, in hardware failure of device elements or the presence of manufacturing defects. In this case, it is more advisable to contact specialists to troubleshoot the problem.
It should also be noted that, together with calibrating the screen, the gadget may need to check and adjust the screen sensitivity parameters for its subsequent high-quality operation.
Power Clean is a popular tool for optimizing the performance of Android devices. The main characteristic feature of this cleaning wizard…
Smartphones and tablets running Android OS have a similar problem for many users...
Failures in the operation of the Android smartphone's sensor are a common problem for not the most careful users. It is enough to drop your phone once, spill something on it, or sit down without noticing it, and there is a significant risk of damaging the touchscreen. If it is damaged, you will no longer be able to use the screen normally; typing a message or simply answering a call will no longer be possible. This smartphone is absolutely useless. That is why it is necessary to calibrate the screen to correct all problems. However, it's not that simple.
To begin with, you should make sure as much as possible about the sensitivity of the sensor. To do this, remove the protective film, if any, and try to type a letter.
If touch recognition occurs incorrectly, for example, instead of one letter a completely different one is typed, then screen calibration is simply inevitable. This can be done in different ways, depending on the phone model, brand, and version of the Android operating system.
Today we will look at various calibration methods on different devices; you can try everything, depending on the situation.
How can I do this through the settings of the device itself?
Due to the fact that problems with calibration are a common problem for users, Android OS developers have added the ability to carry it out without installing unnecessary applications.
In order to go directly to the settings, you need to open general “Settings”, go to the “Display” section, and there we find an item called "Screen calibration". If there is no such item, then find a similar one; the name may differ on different devices and versions of the Android OS.
The calibration process itself is a small test where you need to touch the screen in different places. Once completed, the device will automatically remember the touches, after which the calibration can be considered complete.
Important. Upon completion of all actions, you should make sure that the touchscreen is accurate; depending on the result, calibration can be done again.
We carry out the procedure through the engineering menu
If you are not very knowledgeable about smartphones, then this is probably the first time you have heard about this setup mode.
The engineering menu is a whole storehouse of a wide variety of configurations for your Android. Once in it, you can access all available configurations. This mode is suitable for users who like to fully customize this or that device for themselves.
So, what do you need to get into this very menu? First you need to open the dialing window and enter the following combinations there:
- * # * # 3656633 # * # *
- * # 15963 # *
- * # * # 4636 * # *
Which combination is suitable depends on the smartphone itself.
If suddenly nothing works out, then in order not to suffer with input, you can simply download a special application from, it’s called MTK Engineering Mode Start. You can use it to perform various manipulations with your phone.
Closer to the point. Here we are in the engineering menu. Now you need to do the following:

Using apps
There are many programs that are designed specifically for sensor calibration. There are both paid and free versions. Some of them require Root rights on the device. Below we will tell you about several such applications.
To use this program you need root rights, so before proceeding with the settings, we should take care of this. We have already described how to get root rights on the pages of our website; information about this is freely available.

Primarily created for tablets. The procedure is carried out through the same test, but in addition can significantly improve not only the accuracy of touch recognition, but also improve overall performance and efficiency. This program is indispensable for some Android tablets with handwriting or drawing functions.
The interface is designed in such a way that you can figure it out intuitively, there are no complex settings, and the most ordinary user can figure it out.
It is capable of not only calibrating the touchscreen, but also measuring the tilt angle, tilt height, and the tilt of the object relative to gravity.

Many owners of Android devices with a touch screen often encounter a problem when the screen “does not listen to them.” That is, when you touch the touchscreen with your finger or stylus at one point, the phone perceives it as a touch at a completely different point. Or the sensor completely carries out orders only after 3-4 attempts. And most likely the cause of these problems is the incorrect operation of the screen, and to fix it, you need to calibrate the touchscreen of the Android device.
Android touchscreen calibration: Video
What is it?
Screen calibration is the process of adjusting the touch display to correctly execute commands when touched with your fingers or a stylus. Of course, you can work with your device without such settings, but then get ready to waste your nerves, time and other troubles.
This procedure is required in most cases after the phone has been dropped, especially in water. Replacing the screen, a water stain underneath, even the smallest damage may require urgent adjustments. Checking whether you need calibration is as easy as shelling pears. First, remove the protective film so that the sensor operation is as clear as possible, then simply enter a number or letter. If you selected, say, “B”, and “A” appeared on the screen, then rest assured that you need to configure the touchscreen.
There are two main types of screens used in the production of Android devices: capacitive and resistive. Capacitive is now used in the vast majority, as it is more reliable and of higher quality. But problems often arise with resistive ones, and they require tuning more often. But it’s fortunate that these days they are rarely used - only in outdated or budget models.
Android sensor calibration: programs, setup: Video
How to calibrate the screen on Android?
Configuration using special programs
In free, and most importantly - free, access, you can find a lot of software for screen calibration. They are easy to install, easy to operate and, most importantly, produce results. For example, Clinometer, TOPON, Bubble - just look at Google Play. But? even if you do not have access to Google Play, you can adjust the display without it using the second method.
Self-configuration
In order to independently adjust the touchscreen of Android 4 (or another version) without any problems, we will present you with step-by-step instructions:
- The first step, of course, is to go to the Settings menu.
- Next, select “Phone Settings”.
- Find the “Calibration” item and a target cross with a dot inside will appear in front of you.
- We aim at the center of the target several times (3 will be enough).
- After this, your device will remember the touches and calibration can be considered complete.
- After completing the setup, check the operation of the sensor. If exactly the symbol you clicked on appears on the screen, then everything was done correctly. Congratulations! ()
Setting touch screen sensitivity on Android: Video
Contacting the service center
Now you know two ways to calibrate the screen on your Android device yourself. But there is a third option for setting up your device - an official or private service center. It would seem, why contact the master for such a trifle? But such a problem is not always a trifle. It happens that the cause of the breakdown is not due to incorrect settings, but to a serious breakdown or manufacturing defect of the display. In this case, it is really better to contact the service if the first two do not work.
If the touch screen of your Samsung phone, like any other, is overly or insufficiently sensitive, works uncontrollably and does not respond in a timely manner, then you can try several solutions, one of which is calibration.
If your device's display is protected by film, make sure that you have installed it correctly (there are no air bubbles underneath, dust or moisture).
Wipe the touch screen with a clean, dry cloth, and before using the touch screen, make sure your fingers and hands are clean and dry.
If your device temperature is too high, it may negatively affect the functionality of your touch. Let it cool and then try again.
Turn off your tablet and then turn it on again. This will disable all applications and free up memory, which sometimes automatically solves the problem.
NOTE: if the calibration of the touch screen is broken due to an error, you can restore it yourself according to the scheme described below.
Touch screen problems in Android
You won't be able to do a reboot or shutdown if the display is no longer responding or there are problems restarting.
If the device has a memory card, remove it and reboot - the SD flash drive may be damaged and negatively affect performance.
If your device's performance improves in Safe Mode, then it's likely that one of the applications is interfering with performance.
You can exit safe mode, restart device applications and uninstall the suspected file causing the problem.
If you don't know which apps are causing this problem, you need to remove the recently downloaded ones.
Use the Diagnostics app to quickly test touchscreen functionality.
Diagnostics can evaluate potential hardware or software problems.
Updating your device provides faster performance and the latest improvements.
How to check if touch screen calibration is needed on an Android device
If you want to make sure that you need to calibrate the screen, first remove the protective film, and if it is not there, then clean it with a soft cloth or a special napkin.
Now check the degree of response by touching it: if what appears on the screen is not what you wanted to call, then calibration is needed.
Even when purchasing a new touch phone or tablet, sometimes you need to calibrate the touch screen or if it is not working correctly.
Sensor calibration on Android
Android phones with touch screens are available to everyone today. They have practically replaced the old push-button ones.
The most popular OS is Android and its screen sometimes needs to be calibrated; after this, the efficiency of using a smartphone or tablet usually increases.
Android sensor calibration is definitely necessary if the phone does not respond correctly to finger touch.
This can also happen after aphid liquid gets into the device and falls. Then in many cases you cannot do without a master.
Regardless of the manufacturer: Samsung, HTC, Lenovo, LG or Meizu, the touch screen setup is the same.
To do the calibration, you need to enter the menu and go to “Settings”, scroll down and select “Phone Settings”.
There, select “Calibration” and follow the instructions provided. Before calibration, place the devices on a flat surface and only then perform it.
In general, contrary to appearances, calibrating the Android touch screen is not difficult. Anyone can do this, including those who are not considered to be very familiar with new technologies, can actually achieve success without problems.
In some Androids, screen calibration may be located in the language and input section (depending on the smartphone, tablet and Android version).
NOTE: The calibration option is not present on all devices, so you may not even find such a tool, but there are other effective methods for this.
There are many ways to check a touchscreen phone or Android tablet.
The easiest way is to download an app for this purpose and use it to check. One of the best free multi-touch test that recognizes the user's touch.
If necessary, you can also check the number of strokes the display supports by tapping on the screen with multiple fingers at the same time.
Each time you apply pressure, colored circles should appear on the display, indicating that the touch was correctly recognized.
To view information about the number of simultaneous points, the number of taps and frames per second data, look at the statistics in the upper left corner of the application.
Android touch screen calibration programs
The method described above is not always suitable for all devices, and the accuracy is not always satisfactory.
Programs work more efficiently. One of them is “Touchscreen calibration”,
There is also an option - a tweaker, for fine-tuning the system, but you may need superuser rights (Root rights).
Calibration allows you to increase sensitivity and use your Android phone or tablet to the maximum.
NOTE: Of course, you won’t be able to get anything supernatural, but you should notice the difference right away. Good luck.
Like any device, sooner or later the phone begins to break down and fail. There are a large number of problems that can occur on Android. One of them is the screen’s inadequate response to touches. If the sensor of your Android device does not correctly perform the tasks assigned to it, then most likely the screen calibration settings on the phone have gone wrong.
What does “screen calibration” mean on an Android smartphone or tablet?
Screen calibration is the settings for the device's touch screen. That is, if you ran your finger or stylus across the display, it should display your movements with great accuracy. In the event that your actions and what ultimately happened on the screen differ, you should recalibrate the device. Problems with calibration may occur when replacing the screen, changing device settings, or due to software or physical damage to the device.
Android screen calibration - step by step steps
There are several ways to calibrate Android devices. Some lead through programs that were originally installed on the phone, others require downloading special applications from the Play Market. Let's start with those that require as little action as possible.
Through device settings
Since users have problems with calibration quite often, the developers have added the ability to calibrate the device through the device settings:
Android touchscreen calibration via the engineering menu
On Android devices there is a special menu, thanks to which you can do many things that are not available in normal mode.
- First you need to enter the menu. To do this, dial one of the special codes in the place where you usually enter phone numbers - *#*#3646633#*#*, *#*#4636#*#* or *#15963#*.

Enter the code and add *
- Open the Hardware Testing section.

Go to the Hardware Testing section
- Go to the Sensor section.

Go to the Sensor section
- Next, go to the Sensor Celibration section.

Go to the Sensor Celibration section
- Click on the Clear Calibration button.

Click the Clear Calibration button
- Click on the Do calibration (20% tolerance) button.

Press the Do calibration button (20% tolerance)
- We exit the engineering menu by pressing the “Back” button on the phone several times.

Press the “Back” button several times
Via the Touchscreen Calibration app
In the Play Market you can find many applications responsible for screen calibration, one of them is Touchscreen Calibration.
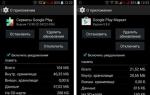
- In the Play Market we find and install the application.

Installing the application
- We launch it from the device menu.

Launch the application
- Click the Calibrate button.

Click the Calibrate button
- We carry out the actions that the program suggests to do.

We carry out simple tasks
- We receive a notification that the calibration was completed successfully.

Notification that calibration is complete
Via the Quick TuneUp app
This application performs the same tasks as the previous ones, but in a different way.

Video: how to increase or decrease sensor sensitivity
How to set up the accelerometer or G-sensor
Also, all modern devices have an accelerometer, which determines the position of the phone relative to a flat horizontal and vertical surface. This feature is used in many games, most often racing games where you control the car by turning your phone, and in some other applications.
Through a special application - GPS Status & Toolbox
You can calibrate the G-sensor using a free application from the Play Market:
- Install the GPS Status & Toolbox application from the Play Market.

Installing the application
- Open it and go to the “Tools” section.

Click on the “Tools” button
- Select the “Accelerometer calibration” section.

Select the section “Accelerometer calibration”
- Place the phone on a flat surface, such as a table or windowsill. Click the “Calibrate” button.

Click on the “Calibrate” button
- We wait for the process to complete and receive a notification that the accelerometer has been successfully calibrated.

Notification about successful accelerometer calibration
Via Engineering Menu
There is a second way to calibrate the G-sensor - through the Engineering Menu:
- Dial one of the special codes in the place where you usually enter phone numbers - *#*#3646633#*#*, *#*#4636#*#* or *#15963#*.

Enter a special code and add *Go to the Sensor sectionPress the Gsensor Celibration button
- We go through the sensor calibration process and exit the engineering menu.

Press the “Back” button several times to exit the engineering menu
Video: setting up the G-sensor on Android
What to do if the sensor triggers spontaneously
Sometimes it happens that the screen at some points begins to press on its own. This can happen if the touch glass has been damaged, causing it to adhere too tightly to the display in certain areas. In this case, you need to take the device to the service center and ask to replace the glass with a new one. Touch glasses are divided into two types:
- Resistive sensors are sensors that respond to changes in pressure, that is, they are triggered when pressed. You can work on such glass using your fingernail, stylus and other objects.
- Capacitive sensors are sensors that only respond to finger touch.
If the screen no longer accurately displays what you want to do, then it's time to recalibrate the display. If the phone does not react correctly to changes in its location in space, then it is worth calibrating the G-sensor. And only if all the previous settings did not help, then you should think about changing the touch glass, which could be broken or scratched.