How to choose and connect a touch light switch correctly. How to connect a touch switch: step-by-step instructions Connecting a touch light switch
Hi all!
The idea of installing touch-sensitive light switches in my apartment stuck in my head. I put off this idea for a long time, but finally took the plunge and purchased one such device.
I want to talk about him.
The thing is new to me, I haven’t seen it from anyone I know or personally used it. Inspired by reviews and comments from people on the Internet. It was decided to purchase one copy for, so to speak, testing. The location of one of the switches (it was the one I was going to replace) in my apartment defies any logic and has nothing to do with convenient use. Therefore, the ability to control the new switch from the remote control was a big plus for me.
And now the package with the device is on my table. 
Inside is a small box indicating the switch configuration. From the information about the manufacturer, only the inscription Made in China. 
The contents of the box fully correspond to the list on the website. It includes: the switch itself, the remote control remote control, an element connected to the electrical circuit (optional) and instructions in English and Chinese. 
Specifications:
Rated voltage: AC 110-240
Maximum load: 3-300W, 800W total
Operating temperature: -20°C~70°C
Relative Humidity: 10% ~ 93% (non-condensing)
Operating frequency: 50/60Hz
Power consumption: 0.02W
Number of starts: 100,000 times
This switch works with one consumer, there are also versions for working with two and three. (I mean connection lines).
Appearance just as I expected when looking at the photos on the store’s website. The workmanship is quite decent, everything is assembled evenly and neatly. 

Main dimensions of the device (in mm).

After a quick glance at the instructions, I proceeded to dismantle the old switch. But everything turned out to be not so simple. The recess in the wall turned out to be broken and the mounting box also required replacement. In the end, I collected everything as it was for now. And in order to satisfy my interest, I connected the switch to the table lamp. There were no difficulties here. The switch works from the slightest touch in the area where the control LED lights up, switching occurs completely silently. I noticed that the sensitivity of the sensor is enough to trigger when the finger is at a distance of about 3-4 mm from the switch. By the way, the brightness of the LED (which shines when turned off) is just enough to see the location of the switch in the dark. 
Disassembly
We remove the decorative cover, which is a plexiglass plate glued to a plastic frame. 
The white area is the sensitive element that reacts to touch. Next, remove the top board with the sensor. It is connected to the bottom through a “block” of contacts. 
Individual photos. 

The bottom board is attached to the base of the switch with three self-tapping screws. Unscrew and take out. 
Back view. 
I'm not good at electronics, so detailed description I can't give it. As I understand it, the aluminum plate is designed to remove heat and is screwed to the element that is responsible for switching. I can’t measure the temperature of the plate and other elements, but tactilely in 2 hours of operation under a load of a 60W incandescent lamp, nothing got hot.
This is what is under the plate itself. 

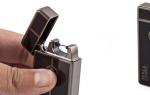
Remote control.
The switch is equipped with a remote control operating at a frequency of 433 MHz. The design of the remote control is in the form of a key fob for a moped alarm. 

Put together quite well. The remote control has four programmable buttons, which are closed with a curtain to prevent accidental pressing, although they are already tight enough to be accidentally pressed. When pressed, the blue LED lights up. Most devices of this type are equipped with such remote controls (as I understand it, to reduce their cost), and some generally need to be purchased separately. It is possible to purchase a more “homey” remote control.
By unscrewing 3 screws, the remote control splits into 3 parts, the chrome insert is made of metal. 
Power comes from a 27A battery. 
 .
.
I was pleasantly surprised by the range of the remote control. In the apartment he worked from anywhere, which is sufficient for me. I decided to go outside to test the range (I live on the second floor), moving away from the house I continued to turn it on and off, at a distance of about 50 m everything worked (then the window disappeared from view around the corner). I think this range of action will find application in the private sector.
Learning the remote control buttons is quite simple. The buttons can be configured for three operating modes:
1. Turn on-off,
2. Just turn on,
3. Just turn it off.
To adjust the initial position of the switch - off. We touch the sensor and wait for a single sound signal, then we press the desired button on the remote control, we hear a control sound signal and that's it - the button is set to the first operating mode. For clarity, I made a video in which you can see the button settings for different modes.
I note that I used the switch only with an incandescent lamp and no problems arise when working with it. I read that when connecting some housekeepers, false positives sometimes occur. To do this, the manufacturer equips the switch with the following element (interference suppression capacitor)

which is connected to the circuit according to the instructions

and is designed to eliminate the problem of false positives.
Overall, I liked the switch, now I’m planning to buy another one just like it on line 2, and perhaps some more aesthetically pleasing remote control.
That's all. Thanks to all. I hope the review is useful to someone. I'm planning to buy +27 Add to favorites I liked the review +23 +50
Technologies do not stand still, and now we already have a touch switch in wide use, which allows us to take the lighting control system in the house to a fundamentally new level.
Our article will tell you why such a device is needed, what it is and how it works. Thanks to this, you can make a touch switch with your own hands for 12 or 220 volts without any problems, and the connection itself, both a home-made device and a purchased one, will not be difficult.
How the device works
Sensor switch has the appearance of a standard touch panel and is similar to a plate consisting of crystalline glass with applied markings. This dimmer can have a wide variety of appearances. The switch circuit is a semiconductor device. It helps control the energy consumer.
A touch dimmer can be connected to luminaires to control the light level. These can be any lamps. But besides this, you can connect electric curtain rods and other modern electronic devices that are part of the “smart home” system to it.
The device circuit (220 or 12 volts), regardless of the number of lamps connected to it, consists of three main functional parts:
- decorative profile or face plate. A sensitive element is placed on it. The profile has the ability to respond to touch or proximity;
- semiconductor circuit. This circuit is the “soul” of the switch. The circuit is responsible for analyzing, controlling lamps and turning on the lights. It converts the sensitive signal that the decorative profile perceives into an electrical impulse;
- switching part. The dimmer in this part perceives the converted electrical signal. It is responsible for various actions with the electrical circuit: smooth adjustment of the light of lamps, opening, closing.
Dimmer device
The operating principle of the device is based on the following: when you touch the front part, a signal is generated, which is subsequently converted into an electrical impulse and activates the switching part of the device.
What is good about the device?
Touch switch is a modern technological solution for comfortable and effective management operation of lamps in the house.
- When installing it you get the following benefits:
- the operating life of the light source, regardless of the type of lamp, is significantly increased due to the smooth switching on of the lighting;
- excellent quality;
- high reliability;
compatibility with any light sources;

Note! The touch dimmer can be connected to any type of light source: diode lamps, induction lamps, incandescent lamps, etc.
- Motion sensor switch
- there are models with voltage of 12 and 220 volts;
- the presence of an economical operating mode, as well as the ability to regulate power;
Possibility of integration into a standard lighting circuit or a smart home system. In addition, the touch switch today is often equipped with additional functionality. To such additional options
- relate:
- the ability to use a dimmer in conjunction with a remote control. With its help, you can remotely control the operation of lamps in the house. You can connect several switches of the same type to the remote control;
Note! The most common addition is a motion sensor.
As you can see, using such a switch (for example, 12 volts), you can greatly simplify your life in your own home.
Selection rules
To take full advantage of all the benefits, you need to choose the right touch switch model. When choosing, you must be guided by the following criteria:
- the number of lamps that will be connected;
- dimmer location;
- is it planned additional connection electrical appliances;
- operating voltage (12 or 220 volts);
- need for additional functions.
Only by taking these parameters into account will you be able to make the right choice.
Now let's look at the most popular models.
Basalte
These are products of the Belgian company Basalte. The company provides a huge selection of a wide variety of touch switch models.

Basalte switch
Such devices are always High Quality, but they are also very expensive.
Livolo
Livolo touch switches are domestic products. Therefore, their price will be several times lower than that of foreign companies.

Livolo switch
At the same time, Livolo touch switches, while affordable price may be slightly inferior in quality. In rare cases, the device may not operate correctly if fluorescent or LED lamps are connected to it.
Legrand
Switches from the French company Legrand are distinguished by excellent quality and functionality.

Legrand switch
But here again you will have to face the high cost of imported products.
By functionality and the variety of models presented, in the market of our country all three brands have almost the same distribution.
They only differ in price and, slightly, quality.

How to install
Connection diagram
Connection of touch switch models occurs as follows:
- Note! Installation of the device is generally similar to that of a standard push-button switch;
- turn off the electricity;
- dismantle the old switch;
- remove the top part of the dimmer;
- we connect the “phase” and “zero” wires according to the diagram to the corresponding terminals;
We install the dimmer in the mounting box and fix it here with screws and spacers.
 As you can see, selecting and installing a touch switch is not difficult. You can do this kind of work without proper experience in about ten minutes. As a result, you will modernize your own home, adding several points to home comfort and coziness.
 Selecting a street motion sensor to turn on the lights
The idea of controlling lighting fixtures using touch switches is not new; similar switches or light switches were produced back in the last century. But the dimensions of such devices were significantly larger than standard ones, which caused problems during installation. It is also worth noting that the cost of the first touch switches was quite high; naturally, this did not contribute to their popularity. With the development of technology, the situation has changed radically, and today capacitive, infrared and remote switches are in stable demand.
Design and operating principle
Despite the variety of models of touch communicators, most of them have a standard design consisting of the following elements:
- Housing made of heat-resistant plastic (see A in Fig. 1). The dimensions of the structure allow installation in a typical mounting location of a conventional switch.
- Electronic unit (B), it includes a power adapter and a semiconductor switch control circuit.
- Board with capacitive sensors (C).
- The front panel (D), as a rule, is made of quartz glass; budget models may use other materials.
Now we will tell you how such devices work. The electronic unit monitors the state of the sensor. When you touch a certain place on the front panel of the switch with your hand (it is marked accordingly), the capacitance of the sensor changes. The electronic unit detects this and changes the state of the contactless semiconductor switch, which opens or closes the electrical circuit.
Scope of application
Initially this type The switches were planned to be used to turn on/off lighting, but the design turned out to be so successful that the scope of its application has expanded significantly. Today, most modern household appliances have touch controls; examples include kitchen stoves, hoods, microwaves, etc.

The only limitation on connecting to touch switches is the power of the equipment; its permissible parameters are indicated in the device passport.
Additional functionality
Modern technical base has made it possible to install microcontrollers in the electronic control unit of a touch switch, has significantly expanded the functionality of the switches and allowed them to fit into the concept smart home. Such switches can be controlled by voice, infrared or radio remote control, smartphone via WI-FI or a programmable timer.
 The touch switch can be connected to the smart home system and controlled using a mobile phone
 Touch switches can be used in conjunction with sensors that respond to motion or light levels. In the first case, such devices turn on a lamp, table lamp or other lighting fixtures when someone enters a room, such as a bathroom. With the second implementation option, the light will turn on at a low light level.
 Sesoo Triple Touch Switch and Motion Sensors
 Some manufacturers, for example, Livolо, produce touch switches with a dimmer function or that control combined sockets, to which almost any household appliance can be connected.
 Livolo touch switch with socket block
 Advantages of capacitive switches
Speaking about the advantages of this type of switches, the following qualities should be noted:

Now briefly about the shortcomings. First of all, it is necessary to note the difference in cost with conventional mechanical switches, but it has become significantly less than 10-20 years ago. The price of inexpensive Chinese touchscreen models today is much cheaper than mechanical switches from well-known brands, such as GTS or Electronics.
Sometimes LED lamps connected to touch switches flicker. This may be due to both the low quality of the lighting sources themselves and the low-cost switch models. The problem can be resolved in two ways:
- Use products from well-known brands (Jazzway, Panasonic, Sapphire, Funry, LightaLight, Tronic, Sesso, etc.).
- Connect a 0.1 uF 630 V capacitor in parallel with the LED lamp.
Connection
The installation of touch switches is practically no different from the installation of conventional built-in and surface-mounted mechanical switches. You can read more about this process on the pages of our website. Let us remind you how to do this using the example of the kg020gs model from the manufacturer FD Electronics.
Connection algorithm:

 Figure 8. Second and third connection stages
 Some manufacturers, for example, Livolo, produce pass-through switches for 220 V (their connection diagram is shown in Fig. 9). With their help, you can control lighting from several places.
 Figure 9. A good example how to connect several pass-through touch contact panels
 Each of these switches controls the lighting in the room from different locations. The concept involves using a main switch and one auxiliary (or more). On the main devices there are three terminals, the phase is connected to one, the zero is connected to the other, and the control conductor is connected to the third. Accordingly, such contacts are marked as: L – phase, N – zero and Com – control wire. Assistive devices
Secondary switches are connected through two terminals: N – zero and Com – control contact. Labeling may vary from manufacturer to manufacturer, so it makes sense to study the instructions. An example is the connection diagram for the electronic dimmer et0802193e, or its analogue tt6061a, which can be controlled with a light touch of your hand.

Selecting a touch light switch
Before purchasing a device, you need to determine its functionality. To do this, the following criteria must be taken into account:
- Power of connected equipment and its connection diagram.
- Execution corresponding to the type of wiring.
- Operating conditions (if installation is planned in the bathroom, then a device with moisture protection is selected).
- Possibility of remote control (remote control or smartphone).
- Compliance of the design with the interior of the room, etc.
Having decided on the main tasks, you can begin to select a manufacturer. Naturally, you should give preference to well-known brands whose products are reliable. But at the same time, it is necessary to take into account the presence in the model range of switches of devices with the necessary functions. For example, Delumo has devices controlled by a radio remote control, and Sonoff specializes in Wi-Fi devices, Capsens Domuns Line lamps are “tailored” only for their touch switches, etc. There can be many nuances, so we recommend that you study the various options in detail.
Based on practical experience, in addition to well-known brands such as Legrand, we can recommend Vento Electric, Wemmon, Fanri, Merten, CGSS, Steu, Schneider, Ariston, etc.
 MakeGood Classic wireless touch switch with remote control and backlight
 We recommend monitoring online reviews where ratings of the best manufacturers are published. Selection criteria are made as per model range manufacturers, taking into account functionality and cost, and other indicators.
Refinement of standard devices
Many people are not happy that the touch area on the panel is quite small, and to record a signal you need to touch it in the indicated place. Let's give an example of how you can increase the area of indirect surface contact.

You should take the wire and carefully solder it to the place where the signal is supplied from the sensor on the touch board (for this you need to study schematic diagram devices). The connected wire is laid around the perimeter of the housing. As a result, such a frame will make it possible to trigger the sensor when touching the front panel without amplifying the signal level.
It should be noted that such an improvement will void the manufacturer's warranty.
DIY touch switch
For those who like to work with a soldering iron, we can recommend several circuits of touch switches that will be easy to assemble with your own hands. Let's start with a simple field-effect transistor circuit, this is exactly the principle that was laid down in the first sensor devices.

Designations:
- Resistances: R1 - 10..15 kOhm (must be selected for sensor response), R2 - 3...5 MOhm.
- Capacitors: C1 – 1000 pF (suppresses false triggering), C2 – 33.0 µF x 50 volts, C3 – 470 µF x 50 V.
- Transistor VT1 – KP 501A.
- Relay K1 can be used of any type whose operating current does not exceed 150.0 mA.
The circuit is powered from a source with a voltage of 12…24 V.
Now let's look at an option based on the NE555 asynchronous RS trigger. The device diagram is shown below.

Designations:
- Resistors: R1 – 1.0 MOhm, R2 – 1.0 MOhm, R3 – 1.0 kOhm.
- Capacitors: C1 and C2 – 15 nF, C3 – 10 nF, C4 – 0.1 µF, C5 – 100.0 µF x 25 V.
- Diodes: D1-D2 – 1N4001, D3 – standard indicator LED.
- Microcircuit - NE555,
- The relay is the same as in the previous electrical circuit.
The above diagram does not need to be configured.
Concluding the topic of homemade sensor devices, we should mention the Ardunio system. On this platform, you can assemble a switching device that can be easily integrated into a Smart Home. In addition, such a device is easy to configure independent work, in accordance with the given program.

In addition, the system allows you to create several profiles for specific tasks. However, this will require programming skills. You can get more detailed information about the Ardunio platform on our website.
Note that in the above circuits, a power source with a voltage of 12-24 V is required to power the control circuit. For this purpose, it is best to use switching power supplies. The electronic balance of LED and energy-saving lamps is ideal as such. Detailed information on this topic can also be found on our website.
The household light switch has been constantly modernized over the many years of its existence. A new stage in the production of switches was the use of touch control technologies. Anyone who has ever used a mobile phone, tablet or payment terminal is familiar with the feeling of ease of use touch panel.
However, for us, ordinary users, controlling the lighting in our apartments and houses using a touch panel is new. And I think many will be interested in learning how such a switch works and how this miracle of technology works in more detail.
Unlike conventional push-button switches, such switches are equipped with touch and remote control functions. The controls are very simple and work on the touch sensor principle. mobile phone or tablet: touch the panel with your finger, the light comes on, touch it again - it goes out. True, the sensitivity zone of the sensor is limited and you need to touch it in a specially designated place.
Besides the beautiful design and elegant look, I also liked the radio control function. When ordering switches, you need to keep in mind that the remote control may not be included in the kit and will have to be purchased separately. The radio remote control makes it possible to control the switch within a radius of 30 m.
Touch switch device
Honestly, until recently, I didn’t even suspect the existence of such interesting lighting control devices. It all started with a part-time job at one site; it was necessary to complete renovations in a two-room apartment and install new sockets and switches to replace outdated ones. But the customer was not satisfied with the usual electrical installation products. He wanted something unusual, fresh and in the “Hi-tech” style.
When I was surfing the Internet and looking for exclusive options, I came across the Livolo company. This was an excellent option to replace a push-button switch (as the customer put it, “a white toggle switch with a button”). After agreeing with the customer, we decided that he liked this option the most and fits the interior of the room very well. After approval, I ordered the following products: 1) single-key touch light switch VL-C701R, 2) two-key touch light switch VL-C702R and 3) control panel for them VL-RMT-02.
I ordered switches and the control panel for them from trading platform Aliexpress. Their cost at the time of order (December 2016), including delivery, was: single-key – 1372 rubles, two-key – 1670, control panel – 338 rubles. The parcel from China took 24 days.
First, let's unpack the boxes with switches and see in what form they were delivered. Everything came in one common package, since the order was made from one seller. The packaging was a little dented, but all the insides were intact.

Switches VL-C701R and VL-C702R Each is supplied in its own packaging. The tempered glass touch panel is packaged in a box separate from the switch. That is, there were four packages in total: two switches and two panels for them. Also included is remote control lighting VL-RMT-02. I would also like to note that the manufacturer offers a wide range of colors of touch panels that will suit any apartment design. I liked the gray color better and ordered the glass panel in that color.

Switches from Livolo are assembled with very high quality and meet all European standards for electrical products. The switch body is made of heat-resistant plastics, and the tempered glass panel can withstand temperatures up to 300 C. The terminals for connecting wires are made of brass.

The front panel is a sensor that transmits signals to turn off or turn on the lighting to the control module. Touchpad attached to the switch with latches. To install the panel in its place, we bring it to the body and lightly press it until a characteristic sound is heard.
All touch-sensitive light switches have an eye-pleasing LED backlight that changes color depending on the state of the switch. When the switch is in the off position, the backlight glows blue, and when the switch is in the on position, it glows red.

To turn it on or off, just touch the sensor with your finger in the highlighted area (circle). The lighting circuit is switched by an electromagnetic relay, so when the switch state changes, you can hear a slight click.
The touch switch is equipped with open circuit protection. When might a regime arise? The most common one is the llama burning out or turning off circuit breaker in the panel, or loss of mains voltage. If such a situation occurs, the switch automatically switches to the “off” mode and remains in it even when the power supply is restored. After eliminating the fault, the switch can be turned on in normal mode, by touching the panel or using the control panel.
These switch models have a built-in radio module for remote control. Control is carried out by pressing the button on the control panel once. The control panel allows you to control the switch at a distance of up to 30 meters from any room in the house (not necessarily in direct view of the device). The remote control runs on a 12 Volt battery, which is not included in the price.
Technical characteristics of livolo touch switch
Nowadays, touch control is present in almost all household appliances. The everyday use of this technology has led to the introduction of such a function in light switches. The front panel of the device is made of optical glass OptiWite has an unusual design, which allows it to find its place in any interior design.


According to their own technical specifications, touch light switch VL-C701R and VL-C702R in no way inferior to a classic push-button switch.
Main technical characteristics:
- 2. Maximum load current: 5A;
- 3. Supply voltage: up to 250 Volts (frequency 50-60 Hz);
- 4. Own consumption: less than 0.1 mW;
- 5. Mechanical life: 100 thousand switchings;
- 6. Remote control distance: up to 30m;
- 7. Ambient temperature: from -30°C to +70°C (humidity 95%);
- 8. Dimensions (h*w*d): 80mm * 80mm * 40mm;
- 9. Housing protection degree: IP20.
What types of lamps can be switched with a touch-sensitive light switch? Dear friends, as you know, today the problem of blinking LED and energy-saving lamps is very relevant. This is due to the backlight used in light switches. I have written about this several times in my articles, if you are not already aware, you can read one of them: the reason for the blinking of an LED lamp when it is off. It describes not only the reason, but also the way to solve it.
The livolo company assures that any type of lamp can be used with their company’s touch switches, from conventional incandescent lamps to the LED lamps and strips that are already familiar to everyone. But this barrel of honey has its own fly in the ointment.
The only drawback of the VL-C701R(VL-C702R) is the backlighting (or blinking) of the LED and fluorescent lamps low power (up to 15 W), with the switch off. That is, if a lamp(s) are connected to the switch total power less than 15 W, then the lamp may blink when turned off.
As a solution to this problem, Livolo suggests using special LED adapters. I did not buy such an adapter. We will check this in a video review - watch it soon on the YouTube channel.
A little about marking designations
As you may have noticed, dear friends, the text of this article contains designation markings such as VL-C701R and VL-C702R. All these numbers and letters carry some kind of information, let's try to decipher Chinese logic.

The marking of each touch switch begins with the letters “VL”; this is a well-encrypted name of the manufacturer’s company - “ Livolo" Immediately after the hyphen there is the encoding “W, R, C6, C7, C8” - this is the designation of the device series. The numbers following the series in the code (01, 02, 03 ...) are the designation of the number of switched lines (that is, a one-, two-, three-key switch). At the end of the list there is a Latin letter (there may be several). R – radio control capability; S – pass-through switch; D – dimmable sensor; T – switch with built-in timer (turns off after 30 seconds).
Setting up the control panel
Touch switches look really very stylish - they will look great in the living room, in the hallway, in the kitchen, and anywhere. Another good thing about such devices is that they can be controlled remotely. To do this, you just need to order a universal remote control online. Price of this device, which is a keychain with a carabiner and a metal front panel, is not that big.

There are four buttons on the remote control panel, they are designated in Latin letters - A, B, C, D. This device operates on a 27A battery with a voltage of 12 volts. This remote control is compatible with a variety of touch switches, in particular with popular LIVOLO brand switches series C6 and C7.

Setting up this remote control is quite simple. First of all, you need to press the touch switch button (while it itself must be in the “off” position) and hold it until the “Pi” sound signal is heard from the touch device - this is about 5 seconds.
Then you should press one of the buttons on the remote control (A, B or C), as a result of which another sound signal should be heard - it means that the “binding” procedure is completed. Now the button that we pressed on the remote control during binding can be controlled (disabled, enabled) by touch switches at a distance. All other buttons on the switches are linked to the remote control in exactly the same way.
It is worth noting that several touch devices can be assigned to one button on the remote control. That is, several buttons and even several remote controls can be linked to one sensor. There is information on the Internet that you can make 8 such bindings (I haven’t tried it myself).
Detaching the sensor from the remote control is also very simple. To do this, touch the sensor and do not release it for about ten seconds. After five seconds the first beep will sound, but this should not be taken into account. And only when another, second beep is heard, all previous settings will be reset.
Universal operating range control panel VL-RMT-02 is 30 meters. This is quite enough for everyday use - the remote control will properly perform its functions throughout the entire territory of an ordinary apartment.
Connecting a single-key touch switch Livolo VL-C701R
So, let's figure out how to connect a 220 Volt touch light switch. In essence, it is no different from the connection diagram for a single-key switch.
On the switch body there are two terminals marked “L-in” and “L-load”. The “L-in” terminal, the literal abbreviation of which sounds like “live line terminal”. If we use electrical engineering translation, it means approximately the following: “live line” - live line, “terminal” - contact, contact screw. In general, this is a contact for connecting the PHASE wire (the one that came from the distribution box).

The “L-load” terminal in the instruction manual is called “lightin terminal”, translated approximately like this: “lightin” - lighting devices, “load” - load. That is, this is a contact for connecting the wire that goes to the lighting load (the wire that goes to the lamp or chandelier).
As you can see, there is nothing complicated in this “electronic miracle”, everything is like in a regular switch, two terminals “phase-input”, “phase-output”. We strip the wires to the required length and connect them to the terminals.

If you install a touch switch to replace the old one, we simply unscrew the wires from the old one and connect it to the new one. The main thing is to decide where the phase is and connect it to the desired contact of the touch light switch ("L-in" contact).

The only thing I would recommend is that if you use a cable with a stranded core, use NShVI lugs. The touch switch has screw-type terminals, and if you push a bare stranded wire there when tightening, you can easily crush it.
This is what the Livolo switch looks like from the side
How to connect a two-key touch light switch Livolo VL-C702R
The VL-C702R switch is designed for switching two independent lighting lines (as evidenced by coding 02); simply put, it is a two-key switch. And there is no difference between its diagram and the connection diagram of a two-key switch.
On the back of the sensor you can see not two, but three terminals for connecting wires: “L-in”, “L1-load” and “L2-load”. The “L1-load” and “L2-load” terminals connect wires going to a group of lamps (each to its own group).


We fasten the mechanism in the socket box

Regarding the installation of the sensor. Installing a touch light switch carried out in a regular socket box. There are no spacer tabs for fixing it, so the switch support is secured in the socket box with screws. By the way, screws are included with each sensor.


Touch switches are, of course, a new word in household lighting control technologies. Their convenience and comfort are obvious, and their cost is gradually decreasing. All this suggests that soon touch-sensitive devices and remote controls for them may en masse replace the usual push-button switches.
Technological progress does not stand still and over time affects all spheres of human life. Home improvement was no exception. For example, a touch-sensitive light switch, which appeared quite recently, has already managed to occupy a worthy niche in everyday use.
The device not only increases the level of comfort, but also increases the service life of lighting fixtures, and is also a stylish design element.
Let's take a look at the operating principles and design features of these devices together. What points should you pay attention to when choosing and how to properly install a touch switch.
The appearance of the classic model of an electronic switching device is almost identical to the touch panel and is a screen made of glossy electrochromic material (crystalline glass) with markings applied to it. There is a wide variety of design options, colors and configurations of devices.
Regardless of the external characteristics and the number of connected consumers, the structural design of the sensor device consists of the following main parts:
- Controller or control unit. Behind the decorative front screen there is an active surface of the sensing element that responds to various stimuli. Based on the type of touch switch, the stimuli are: touching the object of influence, in some models approaching, clapping your hands, voice command.
- Semiconductor converter. In the previous block, a signal is generated, which in this section is converted into an electrical signal of sufficient power to operate.
- Switching part. By means of the switch, the main actions in the electrical circuit are carried out: opening, closing or smoothly regulating the degree of load supplied to the lamp.
Based on the design of the electronic product, its operating principle is obvious: by lightly touching the panel with your fingers, a signal is produced, which is converted and causes the relay to turn on.
Additional functions built into a universal touch-type switch are often used to equip a smart home system: control of the operation of heating devices, opening/closing window roller shutters and others
Distinctive features of a touch device
The electronic device belongs to the high-tech generation of devices, the main purpose of which is to control illumination. The principle of its operation is based on adjusting the current using a microcircuit, while conventional switches use standard-type sliding contacts.
Due to such a board, the formation of a short circuit is eliminated. This means that the service life of the lamps, as well as the life of the switch itself, is significantly increased.

Household modifications of electronic switching devices are used in networks with a voltage of 220 V. They are used to connect sconces, control and adjust the backlight or main illumination
Maximum convenience of controlling lighting devices is the main advantage of a touch (electronic) switch.
It differs from the usual one by the presence of a special sensor, which served as the basis for the name of this type. A sensor located in the structure detects the radiated heat of the hands and responds to touch or to a sound signal.

Sensory mechanisms can be found in Everyday life almost everywhere. This modern sensor allows you to monitor various activities
Since the sensory sensing element itself is not capable of reproducing signals sufficient to start adjusting the lighting equipment directly, the device uses amplification devices. Such conductors are transistors or other alternative elements.
To distribute amplifiers, a cascade placement method is used:
- The first place in the circuit, immediately after the sensor, is occupied by a transistor with high sensitivity and low power.
- Next in the oscillatory circuit is a similar mechanism, but with lower susceptibility, but with sufficient power to transfer a large load to the element.
Quite often, electronic switches use galvanic isolation of the control circuit, where the control signal is sent through optical radiation - an optocoupler. Thus, the fragile part of the mechanism, namely the sensors, is separated from the power part.
It is also possible to use the radio range, where commands are sent via the air protocols of the involved wireless network, for example, BlueTooth or Wi-Fi.

The sensor has a current strength of only a few milliamps, which is insufficient even to transmit a signal to the base of the transistor. Therefore, amplifiers are used to send commands to the touch switch
The active elements that make up the electronic switch can be powered using batteries or the mains. However, for the second option, it will be necessary to perform certain manipulations to rectify the mains voltage and then cut it to the required level.
The simplest example is a semiconductor Zener diode. In rare cases, you can find a built-in full-fledged switching power supply.
Types of electronic switching products
Despite the fact that touch switches are divided into six main types, only three are used in everyday life, namely: capacitive, optical and high-frequency. Let's look at them in more detail.
Capacitive devices - extravagance or necessity?
The capacitive type works as a light sensor and is capable of registering the presence of an object at a set distance. The device is mounted instead of standard light switches, but does not require pressing a button/key mechanism for its operation.
The essence of the work is based on the following algorithm of actions: when the hand approaches the sensitive area touch screen, mainly at 40-50 mm, the device executes a given command - it adjusts the lighting equipment, turning it on or off. Some options require a light touch to the active switch panel.

The Chinese company Suntruth Electrical is one of the few market representatives specializing in the production of touch switches installed in place of conventional
For some, such functionality will be perceived as overkill, but many consumers, especially their female counterparts, appreciate the essence of such a mechanism.
For example, if in the process of cooking in the kitchen you need to turn on additional lighting, then a slight movement of your hand, no matter if it is wet or dirty, can easily control the electronic switch.
The main representatives of capacitive electrical accessories for controlling lighting equipment are produced by the following companies: Jung, Berker, Livolo and Steinel. Despite their popularity, many developers abandoned this type of product and refocused production on separately installed types of devices.
Comfort and savings of optical switches
The switch, equipped with an infrared sensor, perceives exclusively thermal radiation in the infrared range emanating from the body during movement. Its alternative name is motion or presence sensor.

Optical models with a pyrodetector are designed for infrared radiation with a wavelength of no more than 9 microns. Devices from the Delta reflex series from Siemens are universal. They can be installed both on the ceiling and on the wall and even outdoors
The operation of this device is based on the operation of a sensitive pyroelectric element. Optical system redirects heat rays into a semiconductor receiver surrounded by a plastic storage lens.
The last element is divided into segments. Due to this, the area in front of the IR sensor is divided into sequentially located sensitive and insensitive zones, and, accordingly, visible and blind sectors.
The operating principle of the device is as follows: as soon as a moving thermal object enters the area controlled by the lens, a voltage pulse is generated in the pyrodetector. By means of an amplifier, this signal increases, and the switch turns on the lamps.

The most convenient for home use are infrared switches with a sensitive, narrowly directed element placed on a hinge, with one, two or three free phases. Due to this, it is possible to adjust the required level of height and tilt of the lens view.
Relatively recently, Siemens presented a new series of optical touch switches Delta Reflex. These are universal devices that can be installed in any area of the room, including outdoor ones, with a degree of protection from external adverse factors IP 55.
High-tech models are equipped with a control panel, through which the programming of various functions is reproduced, for example, setting a shutdown delay timer or simulating presence for a given period.
Convenience and practicality in high frequency devices
High-frequency touch switches are represented by active type (light) and volume sensors. Structurally, these devices are quite similar to the previous version, but the response principle is significantly different.
The operation of the detector is based on the use of photodiodes. The moment light quanta hit the photosensitive area, the device turns off the lighting equipment. At the same time, its body has a special regulating mechanism, with the help of which the required level of illumination is set.
Such intelligent mechanisms are mostly used for façade lighting. When dusk sets in, they turn on the lights in the area, and when it gets light, they turn them off.

Despite the high degree of protection, light detectors may not work correctly when snow accumulates - having decided that it is dusk, the device turns off the lighting, so the snow must be constantly cleared
Popular models include sensors from German companies Steinel and Osram. Both products installed in place of an old light bulb and individual devices are presented.
Installation is carried out in a break in the electrical circuit that supplies power to lighting devices. The device has a high degree of protection, no less than IP 44.
The operating principle of the volume sensor is based on the emission of weak high-frequency pulses reflected from various pieces of furniture and decor, floors and walls.
Having created a complete picture of the room in the field of reflected microwaves, the light control device inspects it at certain intervals. If a new object appears in the zone, a command is generated and the light turns on; if nothing changes, then the device remains in off mode.
The main manufacturer of such devices is the same company Steinel. They are produced as switches installed instead of standard ones or, more expensive models, in the form of table lamps.
Marking and connection details
We will analyze the markings using the example of an electronic switch model VL C701R from Livolo. The modification of the device is indicated by the Latin letters C6, C7, etc. Next is a two-digit number indicating the number of connected lamp groups: 01, 02 and 03.

Explanation of the VL C701R model markings: VL – abbreviated name of the manufacturer; C7 – series; 01 – one controlled line; R – radio remote control
The last letters will indicate additional functionality of the touch switch:
- R – radio control;
- D – dimmer mechanism, allowing for smooth regulation of the degree of illumination;
- S – pass-through switch function;
- T – shutdown timer.
The connection diagram for the touch switch is the same as for the dimmer.
Conclusions and useful video on the topic
If you decide to turn your home into an intelligent one, you should use tips for choosing electronic models. About this in the story:
Having decided on the model and the necessary functions, it is important to figure out how to reproduce the connection:
Despite the high price category, touch switching devices are equipped with such powerful functionality, which is quite enough to equip a smart home system. Having selected and purchased a suitable model that meets your needs, you can make the connection yourself.
Do you have personal experience using touch switches for lights? Please share it with our website visitors. Tell us about the advantages and disadvantages of such devices that you noticed. Write comments in the block below the article.